Jumat, 07 Mei 2010

Clear All Windows History Files with a Single Click

Today tip will help you to manage the all types of user history in windows operating system. This is a built-in feature of all windows keeps track the user's history, for example the websites you have visited, the documents you have opened and the keywords or files for which you've searched. However this tip is very useful for you, if you are sharing your computer with others or you do not want that the other persons know about your last visited documents history. You can clear these kinds of user's history with a single click on desktop icon named Cleanmru.reg. There is no need to clear each history file one by one. This trick will work in nearly all of the windows versions like windows 2000, XP and 2003.

Follow the given steps for configuration to clear recently opened documents automatically:

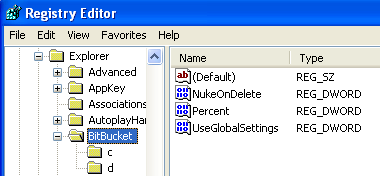
To edit the computer registry, first you should log onto your computer with administrative rights.

Here copy the following 6 lines and paste in notepad then save with the name Cleanmru.reg on your desktop.

REGEDIT4

[-HKEY_CURRENT_USER\Software\Microsoft\Internet Explorer\TypedURLs]

[-HKEY_CURRENT_USER\Software\Microsoft\Windows\CurrentVersion\Explorer\RunMRU]

[-HKEY_CURRENT_USER\Software\Microsoft\Windows\CurrentVersion\Explorer\RecentDocs]

[-HKEY_CURRENT_USER\Software\Microsoft\Windows\CurrentVersion\Explorer\ComDlg32\

LastVisitedMRU]

[-HKEY_CURRENT_USER\Software\Microsoft\Search Assistant\ACMru]

When you double-click Cleanmru.reg icon to remove the windows history, a small dialog box will appear with the information "Are you sure you want to add the information in C:\Documents and Settings\Administrator\desktop\Clearmru.reg to the registry?"

At the end, you will get the message "Information in C:\Documents and Settings\Administrator\desktop\Clearmru.reg has been successfully entered into the registry." Click on Ok button and verify that your all history will have been clear.

Restore the Windows Default Icons

You can restore the all windows default desktop icons, if you accidentally deleted them from your computer desktop.


List of windows default icons.

* My Computer
* Internet Explorer
* My Documents
* My Network Places
* Recycle Bin

Here we are discussing the recovering process of four windows default icons “My Computer, Internet Explorer, My Documents and My Network Places’ and we will cover recovery process of the Recycle Bin icon in next tip.

Fellow the given steps to restore the windows default icons:

* Go to Start Button and open Run then type the given command to open windows Desktop items dialog box.
* Control desk.cpl,,@Web
* Simple copy the above command and paste it in Run box and press Ok,
* Now “Desktop Items” dialog box will appear with different options.
* Under the “General” tab, select the all check box in “Desktop icons” area or click on “Restore default” button to restore the all default icons on your computer desktop.
* Press Ok to close the entire dialog box.

Monitor

The monitor is a television-like box except it is used in a computer for display. You can't use the computer at all without a monitor. The monitor is different from the television is many ways. It is flatter compared to the television. Television refreshes the screen by interlacing while the monitor is using non-interlaced functions. Monitors uses pixels to display, making it finer and better to display text.

Larger Resolution, Smaller Display

One thing you should know, since monitors measure by pixels, you should always set the resolution right. A larger resolution uses smaller pixels, making everything smaller but you have a larger view. The default is 640x480 but most prefer 800x600. For larger monitors, you can decide on 1024x800 or 1280x1024. Also remember, since there are more pixels, the higher the resolution, the slower the screen refreshes.

Decide On A Screen Filter

Although computer screens are just 30% of the radioactivity from the TV or less, you still might want to consider a screen filter. It helps filter up radioactivity. Never settle for a cheap screen filter. A lousy one won't filter the screen - it just darkens it. Always make sure that it won't make everything look dark. Some good screen filters provide a wire to clip it at the back of the casing to lose the radioactivity.

On the other hand, you should also make sure you don't need one. Here are a few points to guide you.

* Your computer (& monitor) is placed under a bright place and can balance with the brightness of the monitor
* Your monitor is anti-glare and non-reflective.
* Your monitor produces little static and radioactivity.
* Your monitor produces clear, crisp and not-too-bright images.
* You won't have problems staring at the monitor for a long time.

If your monitor fits that criteria, you can forget the screen filter.

Blink Your Eyes!

This is not actually a hardware tip, just to let you know how important it is to blink your eyes. Your eyes don't actually get strained staring at the monitor, just loses moisture and making the eyes dry. It has been proven that people staring at the monitor for a long time has the tendency to blink less than the normal rate. Make an effort to blink your eyes. If not, try eye moisture drops.

Degauss

Degauss is a very important function that helps you restore your monitor when colors are distorted or you noticed weird colors at the corners of your monitor. This is cause by magnetization that can be caused by jerking the monitor, shifting to a different direction or moving it across the globe (different magnetic field). The degauss control removes magnetization from your monitor

Use the degauss control lightly. You should only degauss if you see color purity problems. Otherwise, don't use it. Too much degaussing stresses the circuitry components and overheats the large coil around the CRT. If possible, when the display clears up, shut down the monitor/computer for a while to let it cool down.

Take Control

When your monitor comes, modify the factory default setting of your monitor! Get more colors or brightness. And stretch the screen to the fullest! Although this may sound trivial, a lot of people just think it's alright to follow the original setting, losing valuable screen space, you will be surprised to know how much bigger you can stretch the screen. A bigger display is always better.

Rabu, 05 Mei 2010

Set security on your Recycle Bin properties


Today day tip is very useful to manage the security of Recycle Bin properties because by default everyone can change the recycle bin sittings using windows default rights. If you want to restrict your users to modify these settings, simply edit the "Permissions for BitBucket" and set the read only rights for all users. Using windows registry editor you can set the Recycle Bin rights for all user.

The best technique to edit the windows registry, always backup the whole windows registry keys on backup drive before editing. Because any mistake in Registry can cause serious problem in your computer to run properly.

Follow the given steps to edit computer registry for Recycle Bin properties:

To enable this feature, you will need to be logged into your computer with administrative rights.

First click on Start button then type Regedit in Run option.

Here locate the location to:

HKEY_LOCAL_MACHINE\SOFTWARE\Microsoft\Windows\CurrentVersion\ Explorer\BitBucket

Here in left side panel, right click on "BitBucket" keys and click on Permissions option.

Now "Permissions for Bitbucket" dialog box will appear to manage the user's rights.

Here select the user name or group "Everyone" from the list under the "Group or user names" category and then allow read only permissions for selected user under the "Permissions for everyone" section.

Now click on Apply button to save these settings and again click on Ok button to finish the process.

Close the registry editor and restart your computer after any changes to go into effect.

To verify these sittings, simply right click on Recycle bin and go to "Properties" dialog box and any changes here will give you a message "You do not have permission to modify the settings for the Recycle Bin".

Sound Card


A world without sound is boring. The same goes to computers. Imagine playing quake with the beeps from the PC speaker. The sound card is a piece of hardware to generate high quality sound. It enables your to listen to your CD, record voices with the microphone and playing your sound files.

Don't Throw Away Your Old RAM

If you have and old PC that utilizes old 32 bit RAM, don't throw it away. If you have and AWE (advance wavetable effect) sound card, with empty memory slots, you may plug it into your soundcard to load more instruments. Very useful. If you want, you can go to computer junkyards or dealer with old computers to find some old 32 bit RAM. You can get it for almost nothing.

More, more!

If you are using an AWE soundcard, you might want to get more voices or instruments. Go to your manufacturer's website and search for sound fonts. Like fonts, they are the same instruments but produces different sounds. The amount of sound fonts you can load at a time depends entirely on how much memory you have.

No Sound From Mike

An ageing sound card probably doesn't supply the DC voltage needed to power a new electrets microphone-the kind with a mini-stereo (ring-tip-sleeve) plug on the cable. If so, you'll need either an inline battery pack to power the new microphone, or an older dynamic microphone that doesn't need DC power. But the best bet is to throw it away and get a new one.

RAM Won't Work On New Motherboard


If you upgraded your motherboard and CPU to a brand new one, you might encounter with some RAM problems. Either the system seems slower or the total amount of RAM is displayed less than the actual amount during bootup (when you just power-up the computer).

The problem usually occur if you upgraded from a 486 to a Pentium or from non-EDO RAM to EDO. There are a few things you should know. In the older motherboards, you can slot in any RAM of any amount and run them smoothly. However, newer Pentium motherboards handle EDO RAMs differently. Every EDO RAM slots must run in pairs. For example, you can't plug in a 8 meg RAM with a 16 meg RAM and expect them to run together, producing 24 meg. Instead, you must have 2 RAM slots that contains the same amount of RAM (8 meg+8 meg or 16 meg+16 meg e.g) to have them running together.

Also a reminder, you can't plug in a single 32 meg RAM to produce 32 meg. You need 2 16 meg RAMs to produce that amount. So if you need 96 meg, you must fill the the RAM banks with a combination of (16+16 meg) + (32+32 meg). In short, every RAM must run in pairs. They must be placed side-by-side. You can't place a combination of 16+32+16+32 to get 64 meg. You need to place the same amount side-by-side like this: 16+16+32+32. Most motherboard has 4 empty banks for you to place your RAM. Newer motherboards has 6 empty banks. Still, you have to run them in pairs.


Older motherboards and non-EDO RAM don't have to run under this principle. That is why when you upgrade to a newer motherboard, it might not work. Now, back to the problem. Open the cover of your PC and check whether you RAMs are place in pairs side-by-side or not. If not, rearrange them. If you found out you have a combination of a mixture of amounts like: 4+4+8+16 meg, you have to plug one out, buy a new matching one, and replace it. (In this case, take out the 8 meg and by a new 16 meg to produce 4+4+16+16. You can take out the 16 and buy an 8 but that will be downgrading, isn't it?)

This should solve the problem. Also another reminder. SDRAMs don't have to run in pairs. Older motherboard only has 1 empty bank for SDRAM (however, newer ones have more banks). If you want 64 SDRAM, just buy one single 64 SDRAM slot, plug it out, and there you are! But, remember, SDRAM won't work together with EDO. If you plug them in together, the computer will either identify the amount of EDO RAM or SDRAM you have, not both. And it will also only utilize one of them.

More Than 64 Meg RAM On HX Motherboard

It has been a myth that Windows 95 won't work with more than 64 meg RAM. That is not true. But older motherboards do have problems with more than 64 MB RAM.

Motherboards with the Intel HX chipsets is one of them. You can upgrade to more than 64 meg RAM but you must be careful. the Intel HX chipset is built in such a way it requires an additional tag RAM chip used to cached the main memory. The main memory is cached to speed up memory access. Now the problem here is, the tag chip is only capable of handling a maximum of 64 MB. If more than 64 MB is installed, only the first (from the bottom) 64 MB is cached.

Most operating systems uses RAM from top to bottom and since only the bottom one is cached, the OS is using the top uncached memory thus slowing down your system and not utilizing your RAM to the fullest.

Some motherboards have no spare tag RAM socket so I'm sorry to say, you only have a limit of 64 RAM. Some motherboards have an extra tag RAM socket. Just order one from your computer dealer, plug it in, and you can happily increased the maximum of cached RAM to 128 MB.

In short, always check how many tag RAM chips you have before buying more RAM than the maximum allows or it might slow down your system instead of speeding it up.

Unknown Problems

Hardware problems are quite difficult to tackle, worse if under Windows. There was once when installing a software, I accidentally inserted the Audio hardware diskette. Thinking it was harmless, I went on, thinking I can always "undo" everything again. How wrong was I. The next moment I restarted Windows, I got the blue screen of death. Yeah, Windows is very nasty when it comes to hardware.

Find The Culprit

Always calm down. Try to solve the problem yourself before resolving to formatting or sending to your computer dealer. First, know what's happening and the cause of it. In my case, the installation must have overwrite my old setting and replaced the wrong file. There must be a reason why Windows is acting improperly.

Logging Back On

First, try to log back on. If you can't log into Windows, don't panic. Restart the computer. When the text "Starting Windows 98..." appears, press F8. A menu will appear. Choose "Safe Mode" to continue. Safe mode will take some time to load. When you are in Windows, go to Control Panel, System. Click on the Device Manager tab. Find the faulty hardware driver and delete it. Open autoexec.bat and config.sys (both are hidden files in your root directory) with notepad. If the hardware is a CD-ROM or sound card, it will probably write add some lines. Check whether there are backup file (autoexec.bak, autoexec.b~k e.g.) since most installation will back up the 2 important files. If there is, simply replace them with the backup files. If there isn't, put "REM " in front of every line that loads the hardware.

Repairing

When you restart, your computer is probably ok, since you have deleted all instances of the hardware drivers. But the hardware isn't functioning. re-install the hardware drivers, restart and you're done! If the problem persists, your probably have a system conflict go to the next page for more.